
本文档由北京小芽科技翻译,原文来自于ROBOTIS官方技术文档。
3.3 OpenCR 设置
使用USB线将OpenCR连接到Rasbperry Pi。
在Raspberry Pi上安装所需的软件包,以上传OpenCR固件。
1
2
3
$ sudo dpkg --add-architecture armhf
$ sudo apt-get update
$ sudo apt-get install libc6:armhf根据平台的不同,在OPENCR_MODEL名称中使用
burger或waffle。1
2
3$ export OPENCR_PORT=/dev/ttyACM0
$ export OPENCR_MODEL=burger
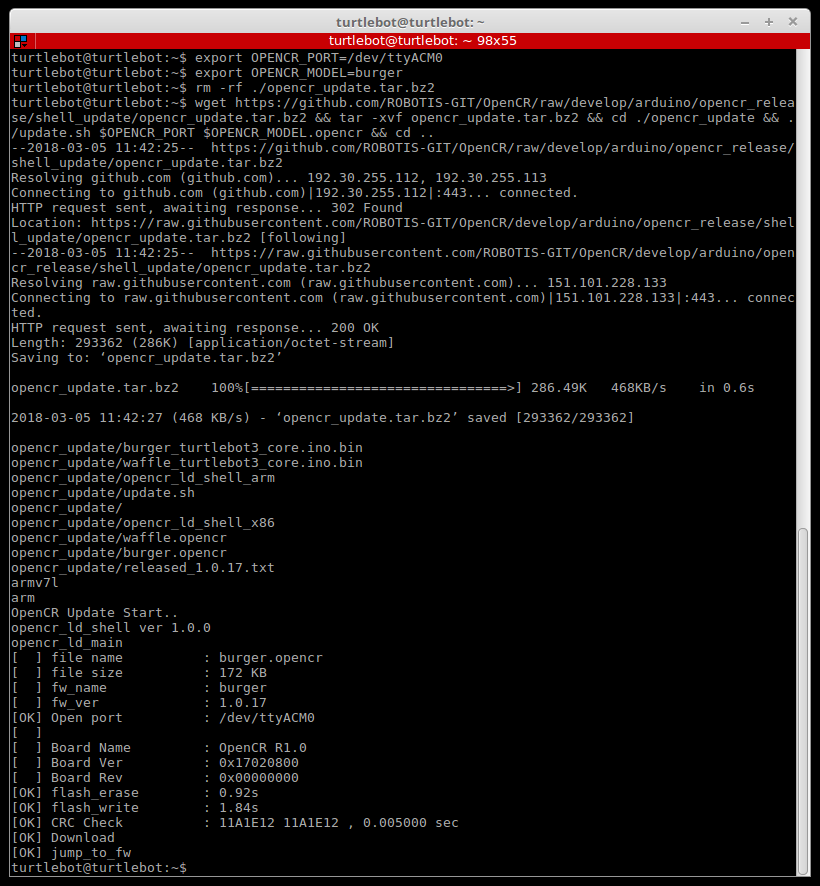
$ rm -rf ./opencr_update.tar.bz2下载固件和加载器,然后解压文件。
1
2
$ wget https://github.com/ROBOTIS-GIT/OpenCR-Binaries/raw/master/turtlebot3/ROS1/latest/opencr_update.tar.bz2
$ tar -xvf opencr_update.tar.bz2向OpenCR上传固件。
1
2
$ cd ./opencr_update
$ ./update.sh $OPENCR_PORT $OPENCR_MODEL.opencrTurtleBot3 Burger的固件上传成功后会如下图所示。
如果固件上传失败,请尝试用恢复模式进行上传。下面的程序可以激活OpenCR的恢复模式。在恢复模式下,OpenCR的 “STATUS “指示灯将周期性地闪动。
- 按住 “PUSH SW2 “按钮。
- 按下 “复位 “按钮。
- 松开 “复位 “按钮。
- 松开 “PUSH SW2 “按钮。

 点击这里展开关于使用Arduino IDE上传固件的更多细节。
 Please be aware that OpenCR board manager does not support Arduino IDE on ARM based SBC such as Raspberry Pi or NVidia Jetson.
In order to upload the OpenCR firmware using Arduino IDE, please follow the below instructions on your PC.- If you are using Linux, please configure the USB port for OpenCR. For other OS(OSX or Windows), you can skip this step.
$ wget https://raw.githubusercontent.com/ROBOTIS-GIT/OpenCR/master/99-opencr-cdc.rules $ sudo cp ./99-opencr-cdc.rules /etc/udev/rules.d/ $ sudo udevadm control --reload-rules $ sudo udevadm trigger $ sudo apt install libncurses5-dev:i386 - Install Arduino IDE.
After completing the installation, run Arduino IDE.
Press
Ctrl+,to open the Preferences menu- Enter below address in the
Additional Boards Manager URLs.https://raw.githubusercontent.com/ROBOTIS-GIT/OpenCR/master/arduino/opencr_release/package_opencr_index.json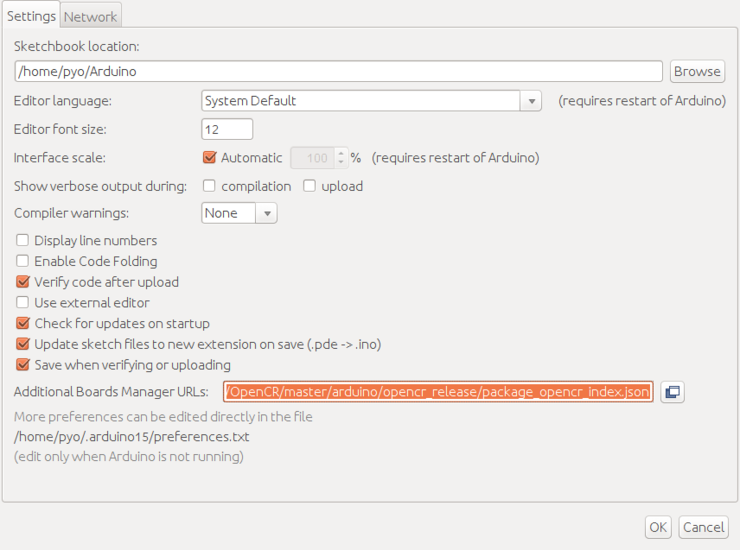
- Open the TurtleBot3 firmware. Depending on your platform, please select the correct firmware.
- Burger : File > Examples > turtlebot3 > turtlebot3_burger > turtlebot3_core
- Waffle/Waffle Pi : File > Examples > turtlebot3 > turtlebot3_waffle > turtlebot3_core
Connect OpenCR to the PC and Select OpenCR > OpenCR Board from Tools > Board menu.
Select the OpenCR connected USB port from Tools > Port menu.
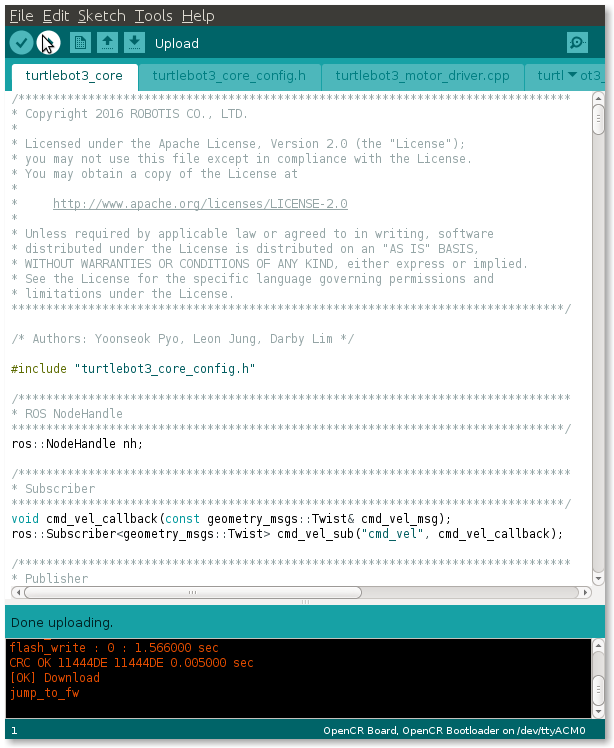
Upload the TurtleBot3 firmware sketch with
Ctrl+Uor the upload icon.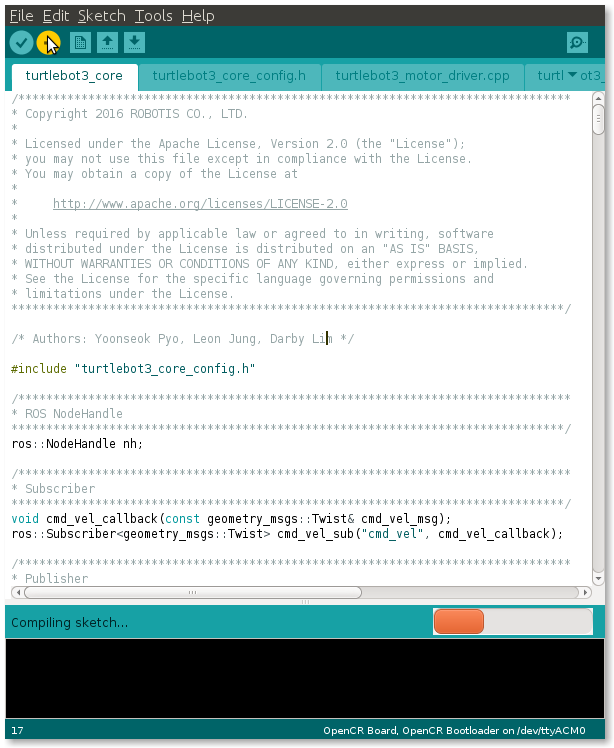
- If firmware upload fails, try uploading with the recovery mode. Below sequence activates the recovery mode of OpenCR. Under the recovery mode, the
STATUSled of OpenCR will blink periodically.- Hold down the
PUSH SW2button. - Press the
Resetbutton. - Release the
Resetbutton. - Release the
PUSH SW2button.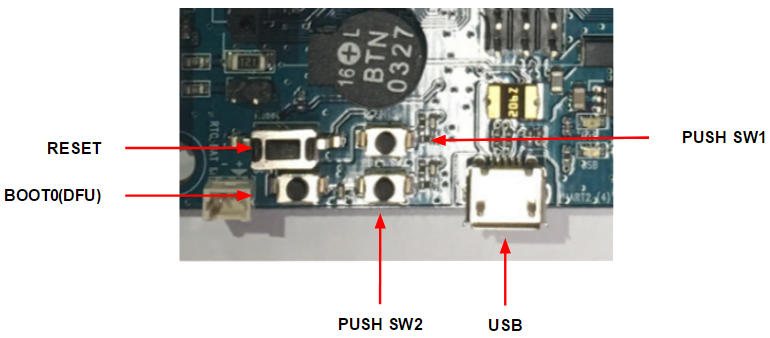
- Hold down the
OpenCR 测试
注意:如果在执行OpenCR测试指令时,轮子没有移动,请务必参阅 “为TurtleBot3设置DYNAMIXEL “部分,以更新DYNAMIXEL的配置,以便使用TurtleBot3。
您可以使用 PUSH SW 1和 PUSH SW 2按钮来查看您的机器人是否已经正确组装。这个过程将测试左、右DYNAMIXEL和OpenCR板。
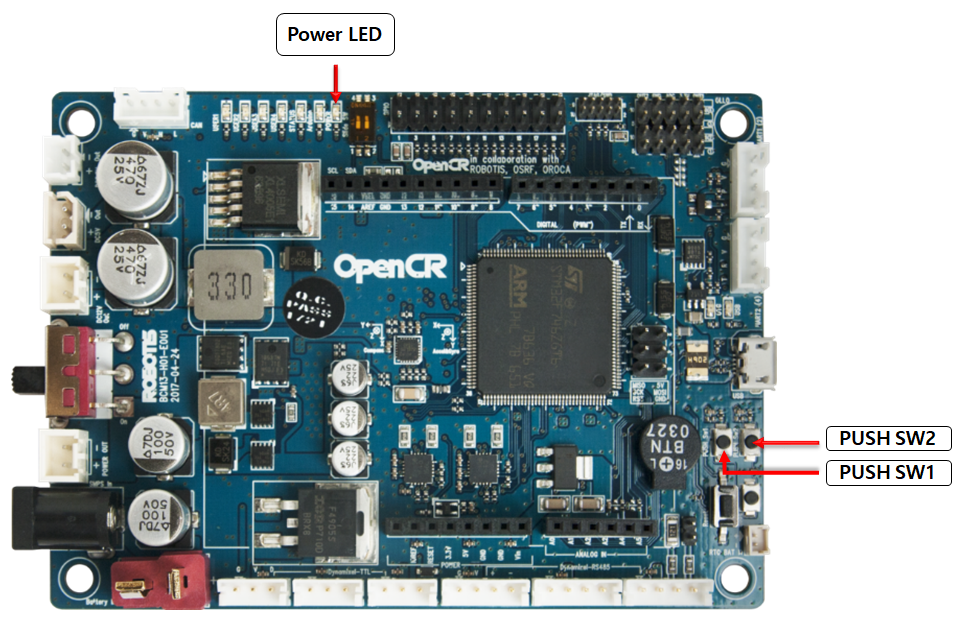
- 组装好TurtleBot3后,将电源连接到OpenCR,打开OpenCR的电源开关。红色的 “Power LED “将被打开。
- 将机器人放在宽阔的地面上。对于测试,建议安全半径为1米(40英寸)。
- 按住
PUSH SW 1几秒钟,命令机器人向前移动30厘米(约12英寸)。 - 按住
PUSH SW 2几秒钟,命令机器人原地旋转180度。